Adding an author to your WordPress site is simple. It enhances your content management.
In a few steps, you can give others access to create posts. This guide will help you understand the process. WordPress, a popular platform, allows multiple users. This is useful for growing blogs or websites. You can assign roles to ensure control.
Adding an author boosts productivity. It divides work and brings fresh ideas. This introduction will guide you through the steps. Learn how to manage users efficiently. Your website can benefit from diverse voices. Let’s start with the basics of adding an author in WordPress.
Prerequisites
Before you can add an author to your WordPress site, there are a few prerequisites. These steps ensure you have the right access and information. This helps in creating new author profiles efficiently.
WordPress Admin Access
To add a new author, you need admin access to your WordPress dashboard. Only users with admin privileges can create new user accounts. Check your user role before proceeding.
If you do not have admin access, contact your site administrator. They can either grant you access or add the author for you. Ensure you have all necessary permissions to avoid delays.
Author Information
Gather all the necessary information about the new author. This includes their name, email address, and a brief bio. You may also need a profile picture.
Ensure the email address is active. WordPress sends notifications and password reset links to this email. A complete bio helps in creating a detailed author profile. It adds credibility to your site.
Creating A New User
Creating a new user in WordPress is a straightforward process. This allows you to add authors to your site easily. It helps in managing your content more effectively.
Navigating To User Settings
First, log in to your WordPress dashboard. Once logged in, find the menu on the left side. Look for the Users option.
Hover over Users, and a submenu will appear. Click on Add New. This will take you to the Add New User page.
Adding User Details
On the Add New User page, fill in the required fields:
- Username – This is the name the user will log in with.
- Email – Ensure this is a valid email address.
- First Name – This is optional but recommended.
- Last Name – This is also optional but recommended.
- Website – Add the user’s website if they have one.
Next, set a password for the new user. You can either create a strong password or use the one generated by WordPress. Make sure to note this password and share it with the new user.
Finally, choose the user role. For an author, select Author from the dropdown menu. This role allows the user to write and manage their posts.
Once all details are filled in, click the Add New User button. The new author will receive an email with their login details.
Assigning Roles
Assigning roles in WordPress is crucial for managing content and users effectively. By assigning the right role to each author, you ensure a smooth workflow and maintain control over your site. Let’s dive into the details of user roles and how to choose the right one.
Understanding User Roles
WordPress offers several user roles, each with different capabilities. The main roles include Administrator, Editor, Author, Contributor, and Subscriber. Understanding these roles helps you assign the appropriate permissions to each user.
The Administrator has full control over the site. They can manage content, settings, users, and themes. The Editor can manage and publish posts, including those of other users. The Author can write, edit, and publish their own posts. The Contributor can write and edit their posts but cannot publish them. The Subscriber can only read posts and leave comments.
Choosing The Right Role
Choosing the right role depends on the tasks you want the user to perform. If you want someone to manage the entire site, assign them the Administrator role. For managing content and overseeing other authors, the Editor role is suitable. If the user only needs to write and publish their own posts, assign them the Author role.
If you want someone to write but not publish, choose the Contributor role. For users who only need to read and comment, the Subscriber role is the best fit. Carefully consider the tasks and assign the role that matches their responsibilities.
Assigning the right role ensures your site runs smoothly. It keeps content organized and maintains security. Take the time to understand and choose the correct roles for each user.
Credit: www.wpbeginner.com
Configuring Author Profile
Adding an author to your WordPress site is just the first step. To make your authors shine, configure their profiles. This helps readers know the person behind the content.
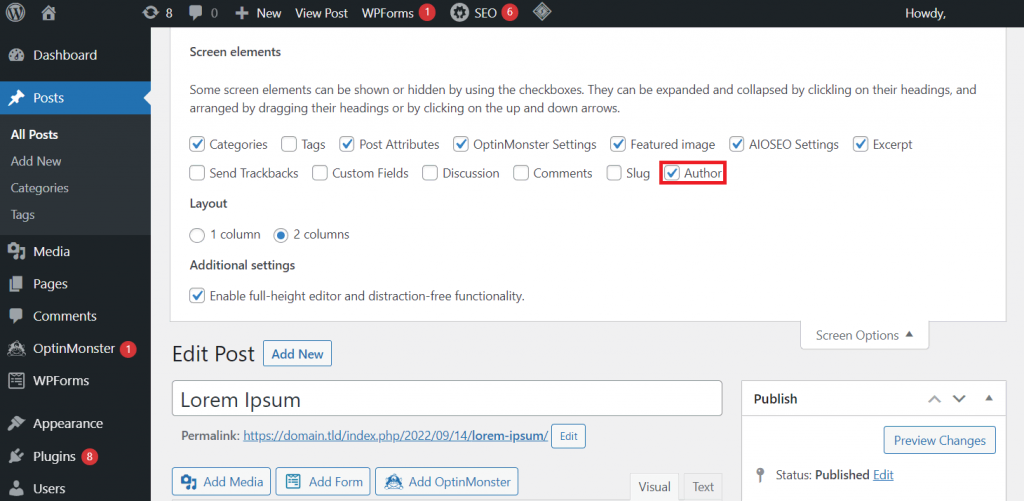
Editing Profile Information
First, navigate to the user profile section in your WordPress dashboard. Here, you can edit the author’s details. Fill in the name, email, and bio sections. Keep the bio short and engaging. It should reflect the author’s expertise and personality.
Uploading Profile Picture
A profile picture adds a personal touch. It helps readers connect with the author. To upload a profile picture, use the Gravatar service. WordPress integrates with Gravatar seamlessly. Create an account on Gravatar and upload the picture. Ensure the image is clear and professional.
Once done, the profile picture will appear next to the author’s posts. This small addition can make a big difference. It builds trust and credibility with your audience.
Managing Author Permissions
Managing author permissions in WordPress is crucial for maintaining control over your website. It ensures that authors can only access and perform tasks relevant to their role. This section will guide you through setting content access and adjusting publishing rights for authors.
Setting Content Access
To set content access for authors, you need to assign appropriate roles. WordPress offers different roles like Administrator, Editor, Author, and Contributor. Each role has specific capabilities. To assign a role:
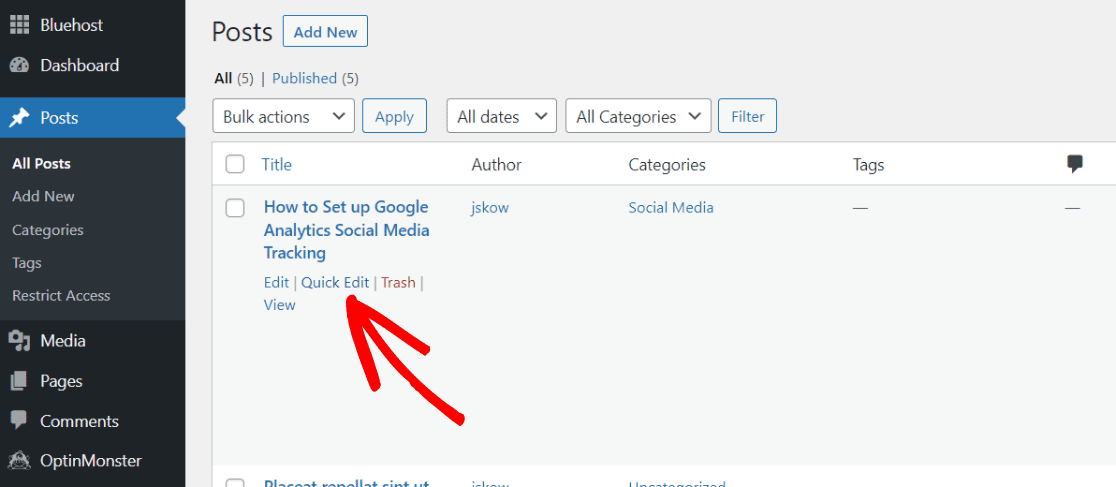
- Go to the Users section in your WordPress dashboard.
- Select All Users.
- Click Edit on the user you want to modify.
- Choose the appropriate role from the Role dropdown menu.
- Click Update User to save changes.
Authors usually have permissions to write, edit, and delete their own posts. For more controlled access, you can use plugins like Members or User Role Editor.
Adjusting Publishing Rights
Publishing rights determine who can publish posts. Authors can write and edit their posts but cannot publish without approval. Editors and Administrators can publish any post. To adjust these rights:
| Role | Capabilities |
|---|---|
| Author | Write and edit own posts, delete own posts, upload files |
| Editor | Publish posts, manage categories, moderate comments |
| Administrator | Full site control, manage themes, add new users |
To modify these capabilities, use a plugin like User Role Editor. This plugin allows you to add or remove specific permissions for each role.
By managing author permissions effectively, you ensure a secure and well-organized WordPress site. Proper role assignment and permission adjustments help maintain order and control.
Credit: www.hostinger.com
Customizing Author Page
Customizing the author page in WordPress enhances the user experience. Readers can learn more about the author. They can also see other works by the same author. This helps build a connection with the audience.
Customizing your author page is simple. It involves adding an author bio and displaying author posts. Let’s explore how to do this effectively.
Using Author Bio
Adding an author bio gives readers insight into the author. It can include a short biography, photo, and social media links. To add an author bio, you can use a plugin. Plugins like WP Author Bio are easy to use. They offer customizable options for your author bio section.
Ensure the bio is concise and engaging. Highlight the author’s expertise and interests. This personal touch builds trust with your audience.
Displaying Author Posts
Displaying author posts on the author page is essential. It allows readers to see all articles by the author. This feature increases user engagement. To display author posts, you can use WordPress’s built-in functionality.
Navigate to Appearance > Widgets. Add the “Recent Posts” widget to the sidebar or footer. Set the widget to show posts by the author. You can also use plugins like Author Avatars List. This plugin offers more display options.
Make sure the posts are well-organized. Use categories and tags to help readers find related content. This improves the overall user experience on your site.
Troubleshooting Common Issues
Adding an author to WordPress should be straightforward. Sometimes, though, issues arise. Understanding common problems can save time and frustration. Below, you will find solutions to typical issues.
Role Assignment Errors
Role assignment errors often occur during the author addition process. Sometimes, the new user does not get the intended role. This can happen due to incorrect settings or user permissions.
To fix this, check the user role settings. Go to the user management section in WordPress. Ensure the correct role is selected for the new author.
If the problem persists, consider reviewing your plugins. Some plugins may interfere with role assignments. Deactivating these plugins temporarily can help identify the issue.
Profile Update Problems
Profile update problems can also be frustrating. Sometimes, changes to the author’s profile do not save. This can be due to browser issues or WordPress settings.
First, try clearing your browser cache. This often resolves profile update problems. If the issue continues, check the WordPress settings. Ensure the user has permission to update their profile.
In some cases, the problem might be due to plugin conflicts. Deactivate plugins one by one to find the culprit. Once identified, consider finding an alternative plugin.
Credit: www.monsterinsights.com
Frequently Asked Questions
How Do I Add A New Author In WordPress?
Go to Users > Add New. Fill in the details. Click Add New User.
Can I Change An Author’s Role In WordPress?
Yes. Edit the user profile. Change the role from the dropdown menu.
What Is The Difference Between Author And Contributor In WordPress?
Authors can publish posts. Contributors can only write and submit for review.
How Do I Manage Multiple Authors In WordPress?
Use a plugin like Co-Authors Plus. It helps manage multiple authors.
How Do I Delete An Author In WordPress?
Go to Users. Find the author. Click Delete. Choose an option for their content.
Can I Assign Multiple Authors To One Post?
Yes. Use the Co-Authors Plus plugin to assign multiple authors.
How Do I Edit An Author’s Profile In WordPress?
Go to Users. Click Edit under the author’s name. Update the profile details.
How Do I Display Author Bios On WordPress Posts?
Use a theme that supports author bios. Or use a plugin like Simple Author Box.
How Do I Restrict Author Permissions In WordPress?
Edit the user’s role. Use a plugin like User Role Editor for more control.
Can Authors Access The WordPress Dashboard?
Yes. Authors can access the dashboard but have limited permissions. They can only manage their own posts.
Conclusion
Adding an author in WordPress is simple and essential. It helps manage content efficiently. Just follow the steps mentioned in this guide. Your website will benefit from diverse voices. Keep your content fresh and engaging. Happy blogging!